Auto Heat Press Temp, Time & Pressure Settings for HTV, Sublimation, DTF
Below is a general reference guide for common heat transfer materials.
Always perform a test press on a scrap piece before final production, as actual settings may vary depending on the substrate, ambient conditions, and material brand.
| Material Type |
Temperature |
Time |
Pressure |
Peel Off |
| Smooth HTV |
145℃ |
15S |
130–170LB |
Cold Peel |
| Metallic HTV |
145℃ |
15S |
130–170LB |
Cold Peel |
| Patterned HTV |
145℃ |
15S |
130–170LB |
Cold Peel |
| Holographic HTV |
150℃–160℃ |
15S–20S |
130–170LB |
Cold Peel |
| Glitter HTV |
150℃–160℃ |
15S–20S |
130–170LB |
Cold Peel |
| Flock HTV |
150℃–160℃ |
15S–20S |
130–170LB |
Cold Peel |
| Puff Vinyl |
155℃ |
15S |
130–150LB |
Hot Peel |
| Sublimation HTV (First Press)
|
200℃ |
15S |
130–170LB |
Cold Peel |
| Sublimation HTV (Second Press)
|
200℃ |
40S |
110–170LB |
Cold Peel or Hot Peel |
| Sublimation Paper |
200℃ |
40S–50S |
110–170LB |
Hot Peel |
| DTF Transfer Film |
150℃–160℃ |
15S–20S |
130–170LB |
Cold Peel |
Note: “Cold Peel” means wait until the transfer cools completely before removing the carrier; “Hot Peel” means remove immediately after pressing.
How to Increase Pressure on HTVRONT Auto Heat Press
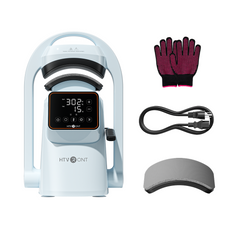
For the HTVRONT A100 Multi Heat Press, pressure can be adjusted using the + and − buttons on the control panel. Press + to increase pressure and − to decrease it. The appropriate pressure level depends on the material thickness – thinner materials require lower pressure, while thicker ones need higher pressure. Always test on a sample piece before running your final project to ensure proper adhesion and even transfer.
For the HTVRONT A300 Hat Heat Press, the pressure is fixed and cannot be adjusted. The factory default pressure is set at 176 LB, which is optimized for hat pressing applications. No manual adjustment is needed or possible for this model.
Regardless of the model, ensure your workspace is clean and the material is placed evenly on the platen to avoid pressure inconsistencies. Regular maintenance, such as cleaning the platen and inspecting for wear, helps maintain consistent pressure performance. For detailed instructions, always refer to the specific user manual for your machine.
How to Use HTVRONT Auto Heat Press
Step 1 – Power On & Preheat
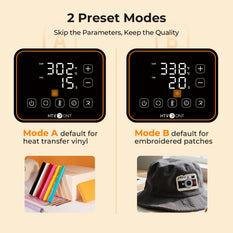
Start by powering on the HTVRONT Auto Heat Press and allowing it to preheat to your desired temperature. Use the digital control panel to set the temperature and time accurately – the precise digital display ensures consistent results every time.
Step 2 – Position Your Material
While the machine is heating, prepare your transfer design and align it carefully on the surface of your material. Once the machine reaches the set temperature, open the press and place your material flat on the platen, making sure it is centered and properly positioned.
Step 3 – Start the Auto Press Cycle
With everything in place, the auto-press mechanism will automatically lower the platen and apply even, consistent pressure. The control panel timer will begin counting down, so you can monitor the progress at a glance.
Step 4 – Remove and Cool Down
When the timer reaches zero, the press will release the material automatically. Carefully take out your project and allow it to cool completely before peeling off the transfer carrier for a clean, lasting finish.
Step 5 – Clean and Maintain
To keep your machine performing at its best, regularly clean the platen with a non-abrasive cleaner and inspect the power cord and moving parts for any signs of wear. Always refer to the user manual for material-specific settings and troubleshooting guidance.
The HTVRONT Auto Heat Press is designed to simplify crafting, making it ideal for both beginners and professionals who value efficiency and reliable results.
Does the Auto Heat Press need to preheat? Is it normal for the power light to flash?
Yes, the Auto Heat Press requires preheating to reach the set temperature. It is completely normal for the power indicator light to flash during this process – this indicates that the machine is actively heating. Once the target temperature is reached, the light will turn solid green, signaling that the machine is ready for use.
If the light continues to flash for an unusually long time and does not turn green, we recommend checking your temperature settings or restarting the machine. Ensure the machine is placed in a well-ventilated area and is not exposed to direct airflow from fans or air conditioners, as this may affect temperature stability.
What is the difference between an Auto Heat Press and a Manual Heat Press, and which one should I choose?
The choice really depends on your experience level, creative needs, and budget. Here is a practical guide to help you decide:
If you are a beginner or on a tight budget – a H10 Manual Heat Press or H1 Mini Heat Press is more than enough to get started. These models are affordable, easy to use, and perfectly capable of handling small-batch projects like custom T-shirts, tote bags, and other flat items. They require a bit more physical effort, but they are a great entry point into the world of heat pressing.
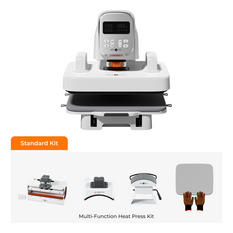
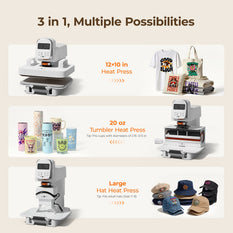
If you want to expand your creative possibilities – say you want to press T-shirts, mugs, and hats all in one setup, then the A100 Auto Heat Press is a valuable investment. The A100 features interchangeable modules that allow you to switch between different types of items quickly and easily, all while maintaining consistent, high-quality results with minimal effort. It saves time, reduces manual labor, and keeps your workflow efficient across multiple product lines.
In short: if you are just starting out, go with a manual press. If you are ready to scale up and diversify your offerings, the A100 Auto Heat Press is a smart choice that grows with your business.
What should I check if the transfer results are not satisfactory (e.g., peeling or uneven color)?
If the transfer does not adhere properly or appears uneven, follow these steps to troubleshoot:
Confirm the material type – make sure you are using heat transfer vinyl (HTV) or the correct transfer medium for your project. Adhesive vinyl is not suitable for heat pressing.
Check pressure settings – insufficient pressure is a common cause of poor adhesion. Adjust the pressure according to your material thickness.
Pre-press the garment – pre-press for 5–10 seconds before applying the transfer to remove moisture and wrinkles, which can affect the final result.
Verify temperature and time – double-check that your settings match the material supplier's recommendations. Each material type has its own optimal parameters.
Use a pressing pillow for thick seams – if your garment has thick seams or buttons, place a pressing pillow or folded towel underneath to ensure even pressure distribution.
Always perform a test press on a scrap piece before running your final project to confirm the settings are correct.


 Black Friday Gift